DIY Whelping Box
Dawghouse Bullies • January 30, 2020

How To Series: Creating an inexpensive Whelping Box (For about $58.00 worth of material including Beer)
Box size:
If the female you are breeding can lay comfortably on her side in a 36" or 42" long crate, then a 48" square whelping box will be perfect. These directions are for a 48" square which will easily accommodate most pocket and standard bullies.
Materials:
Two 4x8 sheets of 1/4" plywood
One 8' 1x1
Two 8' pieces of 1x6
One box of laminate flooring.
(Enough to cover 16s.f.)
Tools:
Tape measure
Utility knife
Spray adhesive (optional)
Nail gun
Circular saw
Jig saw
Pencil
Shoe lace or string
Beer
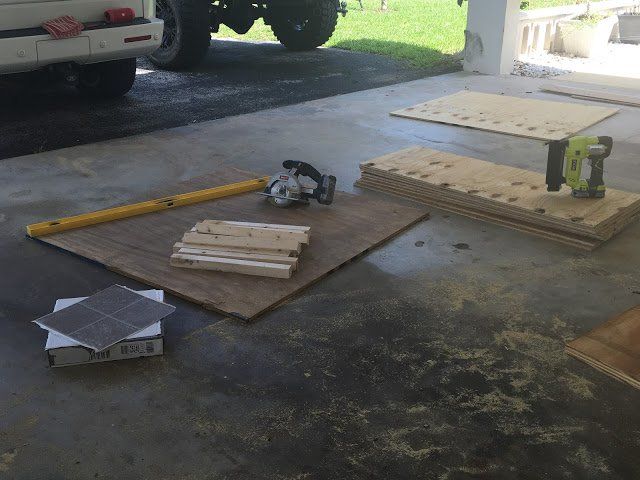
Step 1. The base and corner posts:
Cut one piece of 1/4" plywood in half to give you two 4x4 pieces. One of these will be your base.
We used relatively thin plywood in order to keep weight and cost to a minimum. We have used thicker in the past and saw no benefits.
Cut the 8' 1x1 into four 18" pieces. These will be your 4 corner posts.
Screw or nail one 18" 1x1 into each of the 4 corners.
Next cover the base surface with your vinyl or linoleum flooring. Be sure to notch out the 4 corners for the 1x1 posts. Tip: if you purchase 1 foot squares you will only need 16 pieces at $0.69 a piece at Home Depot.We use the vinyl flooring so that the wood doesn't absorb the urine and discharge.
It can be easily cleaned to keep the box sanitary. Spray adhesive is optional, the flooring tiles have adhesive backing and will stick just fine without it. We just happened to have some lying around.

Step 2. The walls:
Next cut four 48"X 18" pieces out of your remaining plywood. It's already 48" wide so you'll just have to make cuts every 18" across. These will be your 4 side walls. One will be the front with access door. (do not install this one yet)
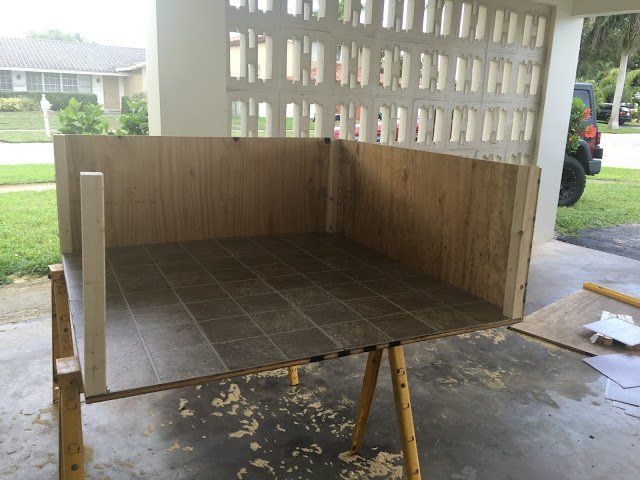
Installing the Walls
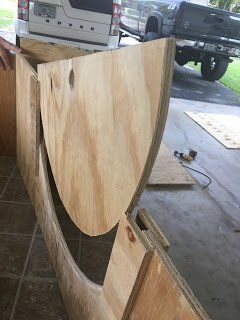
Step 3 Front with Access Panel:
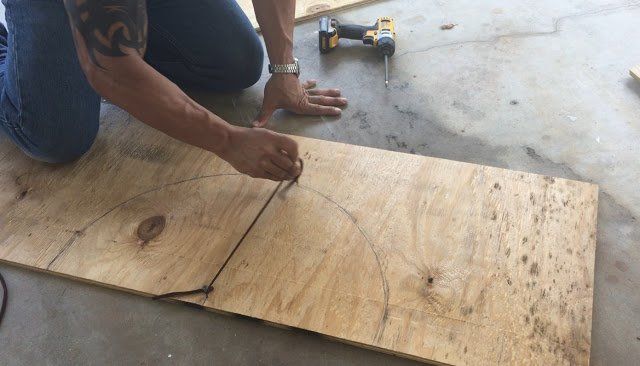
Front Access Panel
On the one side panels which will have the front access door, measure across the length 1/2 way (24") and put a temporary drew or nail in half way. We tied a string from our temporary screw to a pencil in order to draw a semi circle which will mark our access door.
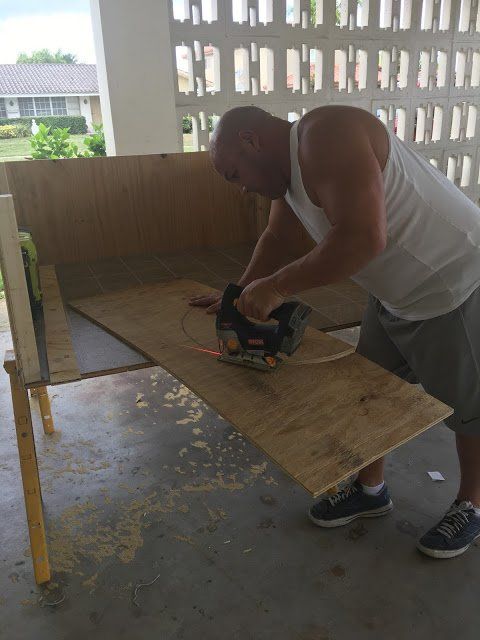
Cutting the semi circle
We then used a jig saw to cut a semi circle on the top side.
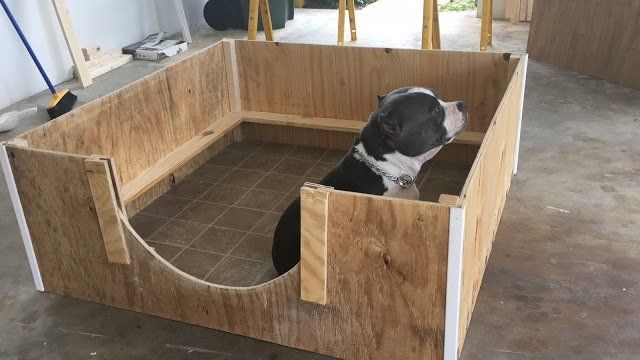
The access door can be used as needed to keep the puppies in. When the pups are first born, the panel is left off completely so that the mother can get in and out of the box very easily.
This is particularly helpful if she's just had surgery. As the puppies get more mobile, you can drop the door to keep them inside. When the puppies are climbing out over the sides of the Whelping box it's time to move them out.
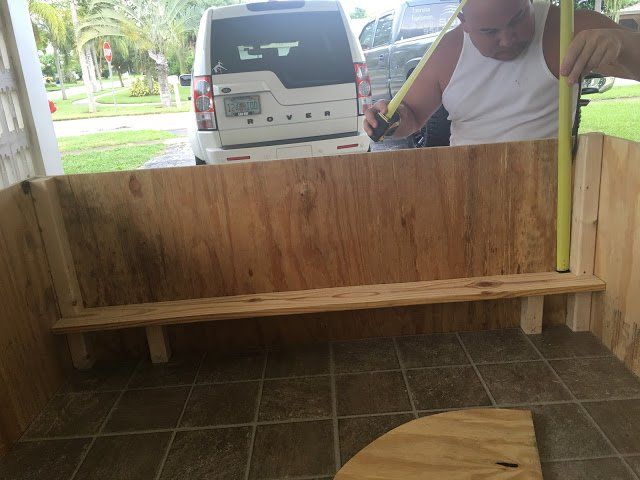
Step 4. The pig rails:
The purpose of the pig rails is to keep the puppy from being smashed between its mother and the side of the box. The puppy slides under the rail, and mom's back just presses against the face of the rail. The puppies are attracted to the darkness under the pig rails. They will quickly learn that it's safe place and spend most of their time there long before their eyes are open.
You can use 1x6 or 1x4 boards to run around the inner diameter of the box.
The height of the pig rail will vary for the size of the female. (between 5-6” off the base has seemed to work well for us)
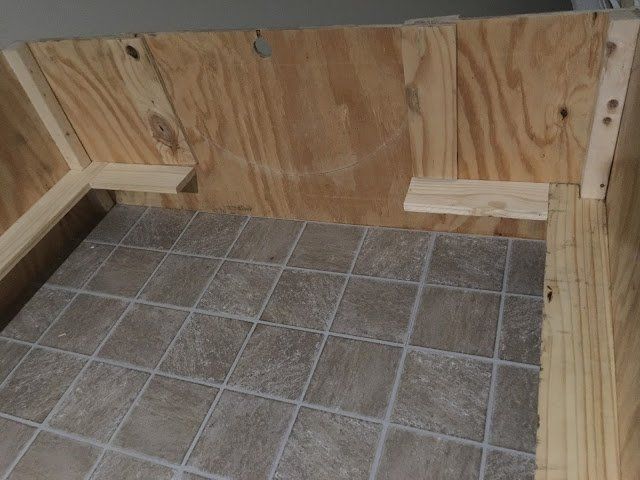
Adding the pig rails
We cut two spacer blocks 5” tall as you can see in the photo above-and reused them under each rail to hold up them to the same height as we nailed them in. Tip: do the two sides first, they will be the same size. Then do the rear which will be shorter.
The Front of your whelping box
Finally the front. The front will be two small pieces the run up to the access door.Bedding:People like to use different things that they've have found to work well for them.
Aww Sookie Sookie Now (Sookie) ApprovesWe don't keep our dogs outside, so to reduce smell, instead of wood chips we use old sheets from day one until the puppies become active. During the first couple days while mom has discharge, we usually have a layer of old towels on top of the sheets. You may be able to get by with only a couple of changes a day… just plan on keeping the washer and dryer running. During the weaning process, Mom will lose interest in cleaning the puppies so the layer of old towels makes clean up a lot easier.
A thermometer near the box is also a very good idea. 85 to 90 degrees F is what we use for our new pups for the first 6 to 8 days. Be certain they maintain a temperature of 97.5-100.0 degree F always a good idea to do a rectal temp on a puppy to confirm the proper temperature is met. At about day 8 start reducing temperature gradually. Always watch to see if they are hot or to cold, either way could kill them if you are not careful. Watch the puppies to see what temperature they want… If they are always piled up, they are too cold. If they are always spread out, they are too warm.

What is Laryngeal Paralysis? The Laryngeal muscles are the muscles that control the larynx and the voice box located in the throat. The function of the larynx is to close off the trachea/windpipe while drinking or eating. Laryngeal Paralysis is an idiopathic trauma to the throat which causes weak or paralyzed, relaxed muscles, and the cartilage collapses to the inside, obstructing air to pass through to the lungs. If this is not treated your bully can go bye bye smothering to the dogs final breath. This little princes you see in my hands is now at the age of 3 and is dying from this condition. She was supposed to be born a pocket, but was born with drwarfism and with many genetic issues.